Last updated on June 5th, 2022
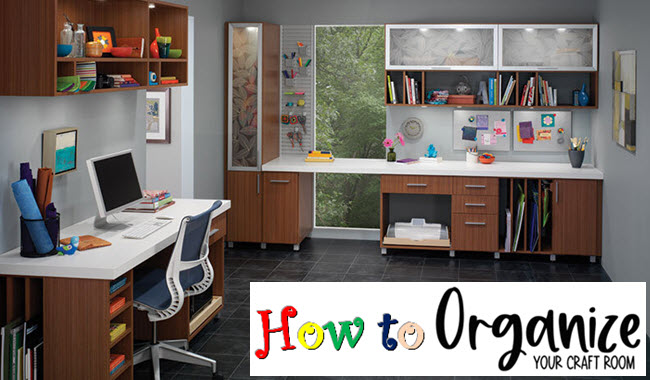
No crafter is complete without their very own space to work freely. Whether you are a jewellery designer with an online business on Etsy, a freelance writer working from home, or an independent artist, your craft room should be an area that invites you to get those creative juices flowing.
If you are one of the freelancers that wanted to know “how to organize your craft room?”, then this article will provides some of the organization tips and ideas to help you better organize the craft room. Read on to find out more.
Designating Your Craft Room
If space is not an issue, you might want to use an entire room, basement, or even the attic as your personal work space. A large craft room gives you greater freedom and flexibility when it comes to designing and allocating the room space for your work stations, tools and supplies. A non-communal space also gives you much needed privacy and quietness to focus on your projects.
Even if you don’t have the luxury of devoting an entire room to crafting, there are still many innovative ways for you to carve out work areas for your crafting pursuits. You can start with your bedroom or any other room at home that has the extra space to accommodate your needs.
A dedicated desk area, shelving units and some rearrangements to existing furniture can be all that it takes to transform a corner of the room into a functioning work area.
Craft Room Woes
Regardless of your set up, the last thing you want is a cluttered craft room that leaves you tired and uninspired. An organized and tidy craft room makes for a pleasant working environment.
With your tools and supplies in order, you don’t have to waste precious time searching for things, or end up frustrated, hot headed and possibly having to spend money replacing items you have misplaced.
Being organized may not be an innate trait for you, but it can be cultivated with time and effort. And it doesn’t have to be a constant uphill battle. Having smart processes and systems in place will make it much easier to be organized and stay organized.
Work can get busy, but your creative space does not have to wind up looking like a war zone after each project.
How to Get Your Craft Room in Order?
So, whether you are establishing your craft room for the very first time or looking to spruce things up, I would suggest going through the following steps to get a better idea of what needs to be done.
Step 1: Assess Your Needs
These are all important questions to ask yourself before setting up or revamping your creative space.
- Are you starting out as an amateur craftsman?
- What materials and supplies do you need for your work?
- How much space do you need?
- How many work zones do you need?
- Are you looking to throw out some unwanted items or upgrade your room?
Listing out your requirements in terms of space size, work zones, type and quantity of craft supplies, etc., will help you identify and match the resources that will suit your needs.
Step 2: Designate Your Craft Room
Perhaps you are just getting started on your first craft room. Or maybe you have decided to move out of your old one and go for an upgrade. Use your answers to Step 1 as a guide to decide the best possible area that can be devoted solely to your crafting pursuits.
You may also want to go back to the points discussed earlier around the choice of your craft room and the issues to consider. If you already have a designated craft room, skip ahead to Step 3.
Step 3: Get Cracking
Now that you know what you need, it’s time to put your plan into action. Typically, this involves buying, creating, gathering and putting your craft supplies, equipment and furnishings altogether to complete your craft room.
For overhauls and revamps, this is also where you start clearing your unwanted stuff, reorganize your work zones and give your craft room a new makeover.
How to Organize Your Craft Room?
Ideally, it would be good to embark on the above thought process every now and then even when it comes to minor reorganizations. Small incremental steps go a long way in making it more manageable to maintain a neat, tidy and updated craft room. To help you up the game, here are ten great tips when it comes to organizing your craft room.
1. Establish Your Work Station
This is a must-have for any craft room. A stable surface top gives you room to have your materials and work comfortably placed within your reach. Whether you are a seamstress with a sewing station or a freelance writer who works on a desktop or laptop computer, a work surface is an essential piece of furniture for your craft room.
The work surface can be an office desk, a built-in table top, or even a floating island counter in the middle of the room. It can be accompanied by a wheeled office chair that gives you the added mobility around the room.
For the health-conscious, you can even use an inflated exercise ball as a makeshift seat or a treadmill for a standing work station.
2. Designate Your Work Zone(s)
Maybe you work on different crafting projects. Or maybe you like to have a creative corner in your own bedroom. Whatever the reasons, a craft room does not have to be monotonous. You can have your home office, craft stations (gift wrapping, painting, sewing, etc.) all in one room.
To bring order to a multi-functional room like this, set up designated work zones within the space. You can set up your computer station as a floating island in the middle of the room, with all other craft stations: your sewing machine, gift wrapping and paper stations, etc., situated around the room for easy access.
You can even use different furnishings, like an accent wall or a carpeted area, to carve out and establish different work zones.
3. Create Your Own Storage Solutions
There are many crafty ideas when it comes to storage solutions. You can start with the basics like shelves and boxes which are simple and effective storage and organizational tools for various craft supplies.
Don’t be limited by the size of your craft room. Express your creativity even when you are restrained by small spaces. Corner desks and shelves are useful for crafters who work in small apartments or spaces.
Transform the back of your door into a storage station with an over-the-door shoe organizer or a mounted pegboard for a professional looking wrapping station.
If you can afford to splurge, consider installing built-in shelf and wall units for a customized look. Otherwise there are also cheaper DIY hacks to achieve the same high-end look without breaking the bank.
With a splash of paint, you can refashion used tin cans into colourful stationery holders. Use decorative paper to spice up plain IKEA storage units before mounting them on the wall for that additional floating storage space.
With different craft materials, it is always good to classify and store them separately. Mini chalk boards or plastic slots for handwritten paper slips make for versatile labels that can be changed easily.
Colour coding also comes in handy for scrapbook paper and stationery, making it easier for you to search for the right colour you need. When it comes to the following materials, you may want to consider these suggested storage hacks for a more organized craft room.
4. Beads and Buttons
Instead of stuffing beads and buttons in drawers, you can use spice jars to sort and store them by sizes and/or colours. For a cheaper alternative, you can also consider used paint palettes as drawer storage boxes.
More craft room organization ideas: https://www.youtube.com/watch?v=-st7qfLLruU
5. Glitter and Sequins
Used make-up containers and vials can be repurposed to store glitter and sequins to avoid accidental splatters. Alternatively, you can even prop cupcake line paper in empty egg cartons and slot them in your drawer. No need for purchased drawer storage boxes to organize your very own glitter drawer.
Ribbons:
Instead of spools, consider wrapping ribbons around cardboard pieces and securing them with ball pins to save space without being messy. Sort the wrapped ribbon cardboards by colours and file them in drawers or boxes. For ribbon scraps, you can wrap them around clothes pegs and store them in little glass jars.
6. Scrapbook and Colored Paper
For a high-end option, organize your scrapbook and colored paper in tall shelf units reminiscent of bookstore layouts. Alternatively, you can group the papers by colour using magazine or file holders for a more affordable but just as presentable option.
7. Tools
For craft materials like gift wrapping paper, pens, knives and scissors, it’s nice to have them all in one place without having to dig through drawers when you just want to wrap a present.
With used tin cans, you may need many of them which in turn take up space. Upsize to a pail to stuff the bulkier items and wrap a caddy around the pail for outside pockets to store the smaller sharper objects.
If you have a collection of scissors of different sizes, you can also consider using a coffee mug holder to keep them organized and easily accessible on your desk.
Yarn
Knitting can become a frustrating exercise when your yarn gets tangled up. You can create a wall organizer using a pegboard to pin the yarn balls. A hanging storage system with many pockets would also do the trick. For something fancier, you can even mount rows of funnels to create your very own yarn dispensers.
Alternatively, you can try using plastic cups (even used and clean ones from McDonald’s) to store the yarn balls with the ends treaded through the lid openings to avoid knotting.
8. Combine Function with Beauty
Just because it is a work space doesn’t mean your craft room must be dull and boring. If you like pastel colours, you don’t have to stick to neutral colours in your furnishing. Spice up your room with a splash of bright colour on the wall and repainted furniture. For a rustic look, consider using mason jars, old flower pots and thrift baskets for your storage purposes.
9. Manage Your Schedule
An organized craft room starts with an organized mind. Have a calendar or personal scheduler on your bulletin board to help manage your to-do list. Instead of checking your mobile devices and getting distracted by Facebook and other social media, have a clock visibly positioned in the room if that helps you keep track of time.
Save yourself from anxiety and give yourself more control over your work with better time management. Stay calm and productive, and you may be surprised at how that translates into a tidier work space.
10. Organize Your Craft Room from Time to Time
Don’t let procrastination become a habit. Set a time every day or weekly to clean and organize your work space. Don’t put it off on the pretext of work. Think of it as a good break and a chance to clear your mind and recollect your thoughts.
As with shoving skeletons into the closet, procrastination will return to haunt you when the mess builds up. Save yourself from an overwhelming spring cleaning session and break it down into small manageable tasks.
After all, there is nothing more frustrating than having everything out of place when you need something urgently.
Don’t Get Obsessed
There is a wealth of craft room designs and ideas on the Internet. And it’s great to browse through them for inspiration. However, there is no need to get caught up with every idea out there. When you are trying to set up or declutter your craft room, don’t make the mistake of buying first.
Like I mentioned earlier, assess your needs first. Then decide what organizational tools you need to help you achieve your goals. Buying a bunch of supplies without a plan may only add more unnecessary or unwanted items to your existing clutter.
Happy crafting!